Injection molding
Products made using injection moulding i.e. caps, stems, bottles etc. These are manufactured using multi cavity moulds and dies. Multiple cavity dies are casting molds with more than one cavity, and all the cavities of the mould are identical.

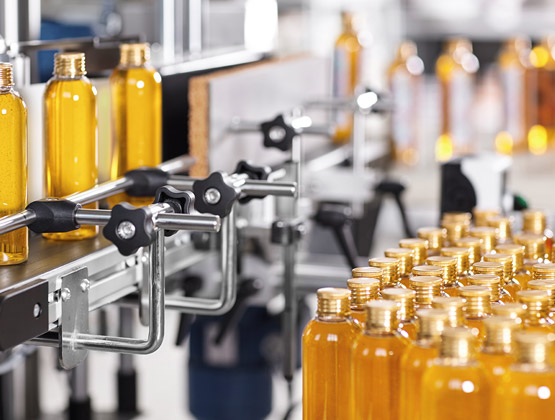
Blow molding
Products made using blow moulding i.e. special grade bottles, droppers, etc. In blw mouolding we blow the plastic to the mould cavity with certain shape using high temprature heat for the product to take shape.
Sealing process
This is an assembly process better known as Induction sealing a process of bonding thermoplastic materials by induction heating.

Injection molding Process
1. Material Feeding
- Step: The raw plastic material (in the form of pellets or granules) is loaded into a hopper.
- Materials Used: Polypropylene (PP), HDPE, LDPE, or other thermoplastics like LLDPE.
- Purpose: The hopper funnels the raw material into the injection unit for further processing.
2. Plasticizing or Melting
- Step: The plastic granules are heated and melted inside the barrel of the injection molding machine by heating bands and friction from the screw’s rotation.
- Machine Part: Reciprocating screw (a rotating screw that also moves back and forth).
- Purpose: To transform solid pellets into a molten, fluid form that can be easily injected into the mold.
3. Injection
- Step: The reciprocating screw moves forward, pushing the molten plastic into the mold cavity under high pressure through a nozzle.
- Pressure Range: 10,000 – 30,000 psi depending on the material and mold design.
- Purpose: To fill the mold cavity entirely, ensuring the part takes the shape of the mold.
4. Cooling
- Step: After injection, the mold and molten plastic inside are allowed to cool down. Cooling lines running through the mold use water or coolant to accelerate the process.
- Purpose: The cooling allows the molten plastic to solidify and form the final shape of the product (e.g., caps, droppers).
- Time: The cooling time varies based on the material, mold design, and wall thickness of the part.
5. Mold Opening
- Step: Once the cooling phase is complete, the mold halves (core and cavity) are separated to reveal the molded part.
- Purpose: To release the solidified part.
6. Ejection
- Step: Ejector pins (built into the mold) push the molded part out of the mold cavity.
- Purpose: To remove the finished part from the mold.
- Note: This step must be done carefully to avoid damaging the part.
7. Post-Processing (Optional)
- Step: After ejection, some parts may require additional steps like trimming excess plastic (known as flash), inspection, and quality checks.
- Optional Steps: Trimming, surface finishing, quality inspection.
8. Recycling of Scrap (Optional)
- Step: Any scrap material (like runners or flash) can be re-ground and reused in the process, reducing material waste.
9. Repeat the Cycle
- Once the part is ejected, the mold closes, and the process begins again, allowing for continuous production.

Blow molding
1. Injection Stage
- Step: Preform Injection
- The process starts by injection molding a preform, which is a thick, short, test-tube-shaped piece made from plastic resin (PP, HDPE, LDPE, etc.). The preform is injected around a mandrel (metal core rod) inside a mold.
- Material: Molten plastic (like PP or HDPE) is fed into the injection mold cavity.
- Machine Part: Injection molding unit.
- Purpose: This preform will later be stretched and blown into its final shape in the blow molding stage.
2. Cooling of Preform
- Step: The preform cools down while still in the mold, solidifying its shape around the core rod.
- Purpose: Ensures the preform maintains its structure and allows for easier handling in the blow molding stage.
3. Transfer to Blow Molding Station
- Step: Transporting the Preform
- The solidified preform, still attached to the core rod, is transferred to the blow molding station.
- Method: A rotating table or robot arm moves the preform while still on the core rod to the blow mold.
- Purpose: To position the preform for blowing into the final shape of the bottle or hollow product.
4. Blow Molding Stage
- Step: Stretching and Blowing
- The preform is placed into the blow mold (which has the final shape of the product, such as a bottle).
- Compressed air is blown into the preform through the core rod, which causes the preform to expand against the walls of the blow mold.
- Stretching: Simultaneously, the preform is mechanically stretched (if necessary) to better form the hollow part.
- Purpose: To transform the preform into the desired hollow shape (bottles, containers, droppers, etc.).
5. Cooling and Solidifying
- Step: Once the molten plastic has expanded to the shape of the mold, it is cooled to solidify into its final form.
- Purpose: The cooling ensures the plastic hardens in the desired shape. This step involves cooling water channels inside the mold to quickly solidify the part.
- Machine Part: Blow mold with integrated cooling channels.
6. Mold Opening and Ejection
- Step: After cooling, the blow mold opens, and the finished part (e.g., a bottle) is released from the mold.
- Ejection: The finished bottle is ejected off the core rod, typically by ejector pins or mechanical systems.
- Purpose: To safely remove the final product from the mold for further processing or packaging.
7. Post-Processing (Optional)
- Step: Any excess plastic (e.g., flash or trims) is removed if necessary.
- Optional: Inspection for quality control, trimming, and additional finishing (such as labeling or printing).
8. Recycling of Scrap (Optional)
- Step: Any scrap material (such as trims or runners) from the process can be reground and reused to reduce material waste.
Key Injection Blow Molding Terms:
- Preform: The initial molded part that will be expanded during the blow molding process.
- Core Rod: A metal rod used to support the preform during the injection and blow molding stages.
- Blow Mold: The mold that forms the final shape of the hollow product when air is blown into the preform.
- Compressed Air: Air that is used to blow and expand the preform into the final product shape.
- Cooling Channels: Water channels inside the blow mold to cool the product quickly and solidify its shape.

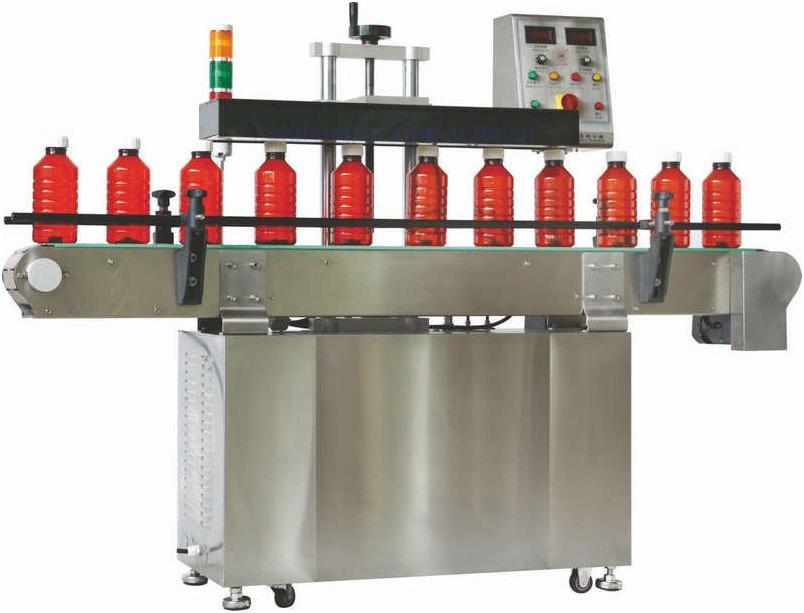
Sealing process
The Induction Sealing Process is a method used to hermetically seal containers, such as plastic or glass bottles, by bonding a foil laminate to the container's mouth using an electromagnetic field. This process ensures product freshness, prevents leaks, and provides tamper-evidence.
Here’s a step-by-step breakdown of the Induction Sealing Process:
1. Container Preparation
- Step: The container (usually plastic or glass) is filled with the product and a cap or closure is applied.
- Liner Inside Cap: The cap typically contains a multi-layered liner, which includes an aluminum foil layer, wax, and a heat-sealable polymer layer. The liner is pre-inserted into the cap before it is applied to the bottle.
- Purpose: The liner will later form the seal between the bottle and the cap.
2. Induction Sealing Setup
- Step: The filled and capped bottle passes under an induction sealing head. The induction head contains a coil that generates an electromagnetic field.
- Machine: An induction sealer, which includes an induction coil and a power supply.
- Purpose: To prepare for heating the foil inside the cap.
3. Induction Heating
- Step: As the container passes under the induction head, an electromagnetic field is created by the coil. The aluminum foil layer inside the cap acts as a conductor and heats up rapidly due to eddy currents generated by the electromagnetic field.
- Heating: The foil heats up without direct contact due to electromagnetic induction.
- Purpose: The heat generated in the aluminum foil melts the wax and polymer layers beneath it.
4. Sealing
- Step: The wax layer inside the cap melts and is absorbed by the paperboard backing, releasing the foil liner. The heat-sealable polymer layer (typically on the bottom of the foil) melts and fuses to the container's mouth.
- Pressure: The pressure from the cap holds the foil in contact with the container's rim, ensuring a proper bond.
- Purpose: To create an airtight, leak-proof seal on the container.
5. Cooling and Solidification
- Step: After induction heating, the polymer and foil cool and solidify, bonding securely to the container’s mouth.
- Cooling Time: This step is very quick, typically only taking a few seconds.
- Purpose: To ensure the seal is fully bonded and ready for transportation or storage.
6. Cap Removal (Optional)
- Step: When the consumer removes the cap for the first time, the foil liner remains sealed to the bottle mouth, providing a tamper-evident seal.
- Purpose: The consumer must peel off or puncture the foil seal to access the product, ensuring freshness and safety.
Key Components of the Induction Sealing Process:
- Cap Liner: A multi-layer liner typically composed of:
- Heat-Sealable Polymer Layer: Bonds with the container rim.
- Aluminum Foil: Heats up under induction to melt the polymer.
- Wax Layer: Melts and absorbs into the paperboard backing.
- Backing Material (e.g., paperboard): Holds the liner in place in the cap.
- Induction Sealer: A machine that generates an electromagnetic field to heat the aluminum foil.